Wearable Application Launch
By Michael Hahn, April 2015
Android wearable devices have an Android operating system, so you can develop applications for wearables much as you do for handheld devices. Simple handheld apps can potentially run in a standalone mode on the wearable, without being paired with a handheld. More commonly however, wearable apps work in conjunction with a handheld for voice recognition, Internet access, and other services.
Android Studio creates a very simple “Hello World” wearable app when you use the new project wizard. If you select Wearable as an option, the wizard creates both a handheld and a wearable app. Typically you install and launch this app using Android SDK tools.
Voice Activation
An easy way to launch a wearable app is with a voice command. Either say “OK Google” or touch the screen. At the “Speak Now” prompt tell Google to start your app, for example “start first wearable”. The wearable then confirms your voice command and launches the the app.

Menu Activation
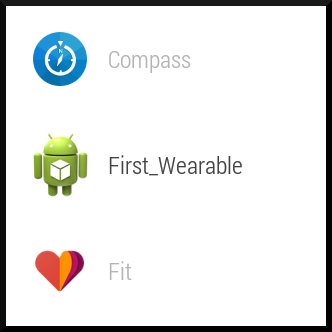
To manually launch the app, touch the watch face and scroll to the last action, which is “Start…”. Then select your app from the list of installed apps, in this case First_Wearable.
So far, not a single line of new code was necessary; the Android Studio new project wizard created it all. The upcoming sections show how to add more interesting content and actions.
Handheld Activation
A great way to start your wearable app is from a notification on the wearable. This is useful when you already have a handheld app and want to extend features to a wearable. The handheld app starts the launch process by sending a data object to the wearable that contains the information the wearable needs to post a notification locally. Users swipe this notification and tap the Open icon to launch the wearable portion of your app. They return to the notification stream when the wearable app closes.
Often times you want to launch the wearable app with extra data that tells it what feature to open or what data to display. For example, a general handheld golf app might open the wearable for a specific golf course. This section includes details about adding such data to the launch process. Without this, the wearable app simply launches in its default mode.
Prerequisite
This procedure relies on communication through the data layer. Communication through the data layer requires setup of Google Play Services for wearables in both the handheld and wearable devices (see Data Layer DataMap Objects).
Post a Notification
- First create a DataMap object that includes the title and body for the notification. Optionally, include any extra data that you want to pass to your wearable app when it starts. Then send this DataMap object to the wearable data layer, along with a path constant that identifies the purpose of the data. The SendToDataLayerThread class in this example is defined in Data Layer DataMap Objects.
String WEARABLE_START_PATH = "/wearable_start";

// Create a DataMap
DataMap notifyWearable = new DataMap();
notifyWearable.putString("title", "Notification Title");
notifyWearable.putString("body", "Start now?");
// Optional extra data to use when starting wearable
notifyWearable.putString("extra", "extra data")
// Send to data layer
new SendToDataLayerThread(WEARABLE_START_PATH, notifyWearable).start();
- In the wearable, receive the DataMap in a WearableListenerService class. The following excerpt shows a sample override for the onDataChanged method of the service.
@Override
public void onDataChanged(DataEventBuffer dataEvents) {
  DataMap dataMap;
  for (DataEvent event : dataEvents) {
      // Check the event type
      if (event.getType() == DataEvent.TYPE_CHANGED) {
          // Check the data path
          if (path.equals(WEARABLE_START_PATH)) {
              // Create a local notification
              dataMap = DataMapItem.fromDataItem(event.getDataItem()).getDataMap();
              sendLocalNotification(dataMap);
           }
        }
    }
}
- In the wearable, implement the procedure that constructs and posts a demand (notification) that can launch your app. Optionally, the Pending Intent in this notification can include extra data for the wearable app.
private void sendLocalNotification(DataMap dataMap) {
  int notificationId = 001;

  // Create a pending intent that starts this wearable app
  Intent startIntent = new Intent(this, HoleActivity.class).setAction(Intent.ACTION_MAIN);
  // Add extra data for app startup or initialization, if available
  startIntent.putExtra("extra", dataMap.getString("extra"));
  PendingIntent startPendingIntent =
    PendingIntent.getActivity(this, 0, startIntent, PendingIntent.FLAG_CANCEL_CURRENT);

  Notification notify = new NotificationCompat.Builder(this)
    .setContentTitle(dataMap.getString("title"))
    .setContentText(dataMap.getString("body"))
    .setSmallIcon(R.drawable.ic_launcher)
    .setAutoCancel(true)
    .setContentIntent(startPendingIntent)
    .build();

  NotificationManagerCompat notificationManager = NotificationManagerCompat.from(this);
  notificationManager.notify(notificationId, notify);
}
The wearable notification stack now includes a notification inviting the user to launch your wearable app. A swipe to the left displays the launcher icon, which the user clicks to launch the app.

- In the wearable app, receive and process any extra information. Normally, you implement this within the onCreate override of your app.
// Check for extra data in the intent
// If present, extract and use

Bundle extras = getIntent().getExtras();
if (extras != null) {

    // Get the extra data
    String extraData = extras.getString("extra");
    ...
    // Act on the extra data
    ...
}