Always-On Wearable
By Michael Hahn, November 2015
Some Wearable apps are most useful when they remain in the foreground for an extended period of time. For example, a golf app needs to be available for an entire round of golf and a shopping app needs to be visible for all purchases. At the same time, these apps need to conserve power by changing to the low-power ambient mode during periods of user inactivity. The always-on feature adds this capability to Android wearable apps.
An always-on app never times out to the watchface. While a user views or interacts with the app it operates in an interactive mode that displays content in a bright full-color screen. After a few seconds on inactivity the app switches to the ambient mode, where content is simple and dimmed. A twist of the wrist or tap on the screen restores the normal interactive mode. When finished, a swipe to the right closes the app and returns to the watchface.
This section describes how to create your first always-on application.
Enable the Always On Feature
To create your first Always On app, Create an Android Studio Project. The new project has two apps, one for the handheld device and another for the wearable. The handheld app is needed only because wearable apps are always packaged within a handheld app.
Verify the SDK Versions
Verify the SDK and build tools versions specified in the build.gradle (Module:mobile) and build.gradle (Module:wear) files.
android {
  compileSdkVersion 23
  buildToolsVersion "23.0.2"

  defaultConfig {
      applicationId "com.androidweardocs.alwayson"
      minSdkVersion 21
      targetSdkVersion 23
      ...
    }
Verify Build Dependencies
Verify the dependencies specified in the build.gradle (Module:wear) file.
dependencies {
  compile 'com.google.android.support:wearable:1.3.0'
  provided 'com.google.android.wearable:wearable:1.0.0'

  compile 'com.google.android.gms:play-services-wearable:8.3.0'
}
Add WAKE_LOCK Permission and Uses-Library to the Manifest
Add the WAKE_LOCK permission at the top level of the manifest. To run this app on a pre-22 APK, you set the wearable library requirement to false in the application section of the manifest.
<manifest xmlns:android="http://schemas.android.com/apk/res/android"
  package="com.androidweardocs.alwayson" >
  <uses-permission android:name="android.permission.WAKE_LOCK" />
  <application
        <uses-library android:name="com.google.android.wearable" android:required="false" />
    ,,,
  </application>
</manifest>
Create a WearableActivity Class
To enable the Always On feature, extend your main activity from WearableActivity, and invoke setAmbientEnabled in the onCreate method.
public class AlwaysOn extends WearableActivity {
  @Override
  public void onCreate(Bundle savedInstanceState) {
    super.onCreate(savedInstanceState);
    setContentView(R.layout.activity_always_on);
    setAmbientEnabled();
    ...
  }
}
Customize the Ambient Display
When the wearable enters ambient mode you change the display to a minimum power theme. Informational content should be changed to white or grey content on a black background. Controls are hidden. On return to the interactive mode, you reverse the changes to display everything with full colors and brightness.
Handle Ambient Mode Transitions
Handle entry and exit from the ambient mode by implementing onEnterAmbient and onExitAmbient respectively. The following entry example changes the background to black and the text to white with antialias disabled.
@Override
public void onEnterAmbient(Bundle ambientDetails) {
    super.onEnterAmbient(ambientDetails);
    mTextView.setBackgroundColor(Color.BLACK);
    mTextView.getPaint().setAntiAlias(false);
    mTextView.setTextColor(Color.WHITE);
}
On return to interactive mode reverse all your ambient mode changes.
@Override
public void onExitAmbient(){
    mTextView.setBackgroundColor(Color.CYAN);
    mTextView.getPaint().setAntiAlias(true);
    mTextView.setTextColor(Color.BLACK);
    super.onExitAmbient();
}
Update Content in Ambient Mode
In the ambient mode you refresh the display with current content by implementing onUpdateAmbient. This method is called every 60 seconds. For more frequent updates you can respond to incoming data, use the alarm manager, or implement a Handler. To benefit from the power-saving capabilities of the ambient mode, keep the update interval greater than 10 sec.
This simple example appends a number to the hello message, which it increments every 60 seconds.
@Override
public void onUpdateAmbient() {
    super.onUpdateAmbient();
    mTextView.setText("Hello Square World! " + i.toString());
    i++;
}
First App Display Setup
The default theme for the wearable displays white text on a black background, which is a typical ambient mode display. To try out the always-on display features, modify the wear layout to specify black text on a cyan background, and set the width and height of the text view to fill the parent:
<TextView
    android:id="@+id/text"
    android:layout_width="fill_parent"
    android:layout_height="fill_parent"
    android:text="@string/hello_square"
    android:textColor="@color/activeText"
    android:background="@color/activeBackground"
    />
Define the new colors in a resource file, colors.xml:
<resources>
  <item name="activeBackground" type="color">#FF00FFFF</item>
  <item name="activeText" type="color">#FF000000</item>
</resources>
Try the App
Verify the app on an emulator or device (see Set Up Your Wearable). You need Lollipop 5.1 (API 21) as a minimum to use Always On. To start the app, when select Run -> Wear from the Run menu on Android Studio. The interactive screen displays the Hello message in black text on a cyan background.

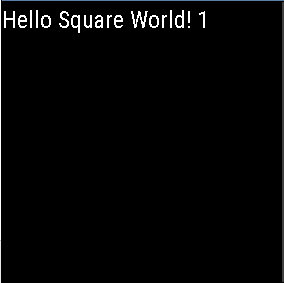
When the watch enters the ambient mode, the text color changes to white and the background to black. Had there been any buttons or controls, they would have been hidden.

After one minute the ambient display is modified, in this example to include a number.
To stop this app and return to the watchface, tap screen to enter the interactive mode and swipe to the right.
Example
The working example for this section is at https://github.com/LarkspurCA/WearableAlwaysOn.